Showing posts with label Dessert. Show all posts

Friday, January 13, 2012

Banana Chocolate Chip Bundt Cake

I won't lie to you- bringing baked goods into my office is a secret joy of mine.  I  don't do it often- don't want to spoil my co workers, but when I do- it's just always so much fun.  I tend to do it in secret- I unwrap the goodies in the kitchen before many people are here, and then nonchalantly walk away hoping not to be spied by anyone.  Then, as people arrive I get to hear the exclamations as people stroll to the kitchen for their morning coffee or water and discover the offering.  Throughout the morning I then have morbid curiosity to find out how quickly it is devoured. What can I say- it's a little ego boost.  


Last night, I stood in my apartment, cleaning out my fridge of leftovers for the week for dinner, I noticed two sad looking bananas in my fruit bowl.  Purchased, I'm sure with the idea of eating them over last weekend, forgotten about, and then pushed aside when I went grocery shopping the week in favor of newer, tastier bananas.  They looked so forlorn there, pretty yellow siblings lying next to them, and my apple pear mocking them, I decided that I had to rescue them.  I quickly found a recipe for Chocolate Chip Banana Bundt Cake and those that were forlorn were re-purposed.  Life again.  I knew that I would want that cake out of my house pronto- so as soon as possible I wrapped up the cake, and put it with the rest of my stuff for the day.  Two birds- one stone.


Banana Chocolate Chip Bundt Cake (stolen from Tastebook.com


  • 2 cups chocolate chips
  • 3 cups all-purpose flour
  • 1 tbsp. baking powder
  • 1/2 tsp. salt
  • 1 cup mashed ripe bananas (about 2 large bananas)
  • 1/4 cup whole milk, at room temperature
  • 1 tbsp. vanilla extract
  • 1 cup butter, softened
  • 1 1/2 cups sugar
  • 4 large eggs

DIRECTIONS

Preheat the oven to 325 degrees. Butter a 10-inch bundt cake pan and dust with flour. Toss the chocolate chips with 2 tablespoons of the flour and set aside. In a medium bowl, stir together the remaining flour, baking powder and salt. In another bowl, stir together the bananas, milk and vanilla. In a large bowl, using a handheld electric mixer, beat together the butter and sugar until combined. One at a time, beat in the eggs, mixing well after each addition. In three additions each, mix in the flour and banana mixtures until just combined. Using a wooden spoon, stir in the chocolate chip mixture. Scrape the batter into the prepared pan and spread evenly. Bake for 65 to 75 minutes or until a toothpick inserted into the center comes out clean. Transfer the pan to a wire rack. Cool 10 minutes. Carefully invert the cake onto the rack to remove it from the pan and cool completely. For a garnish, sift confectioners’ sugar over the top of the cake or drizzle with melted chocolate chips. Store the cake in an airtight container at room temperature. 


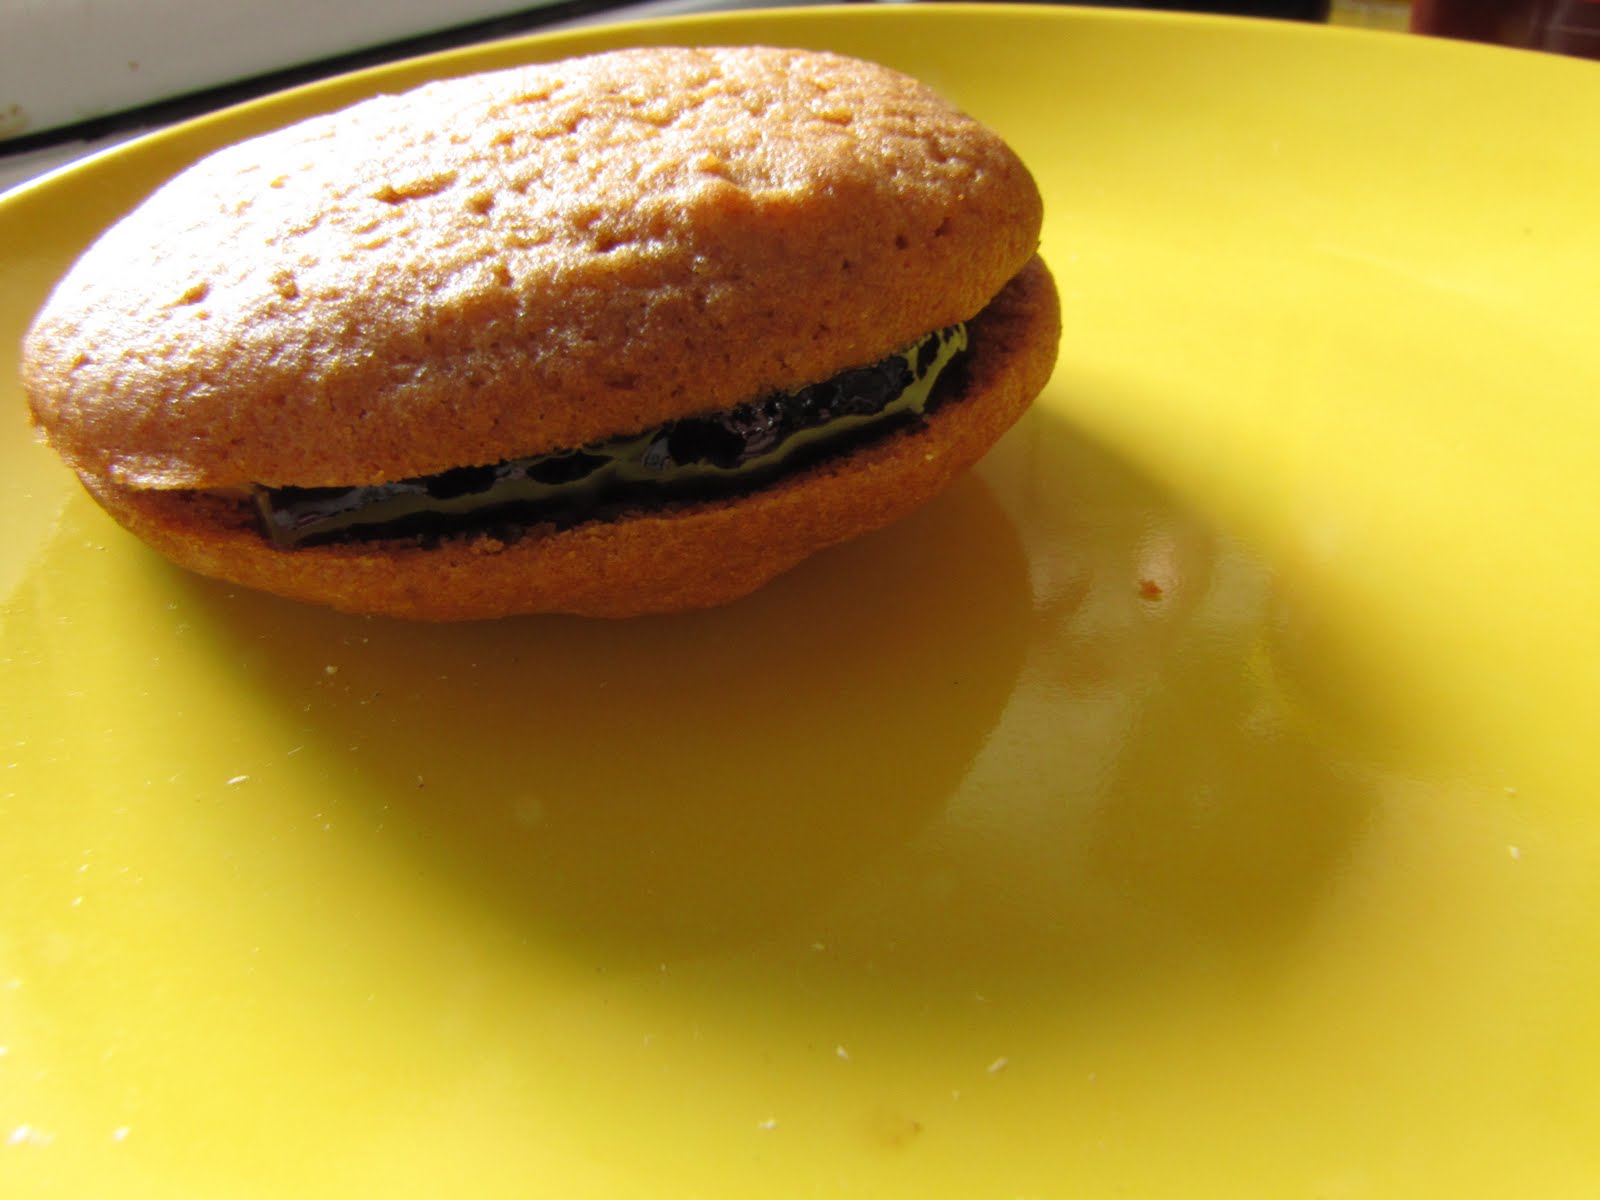
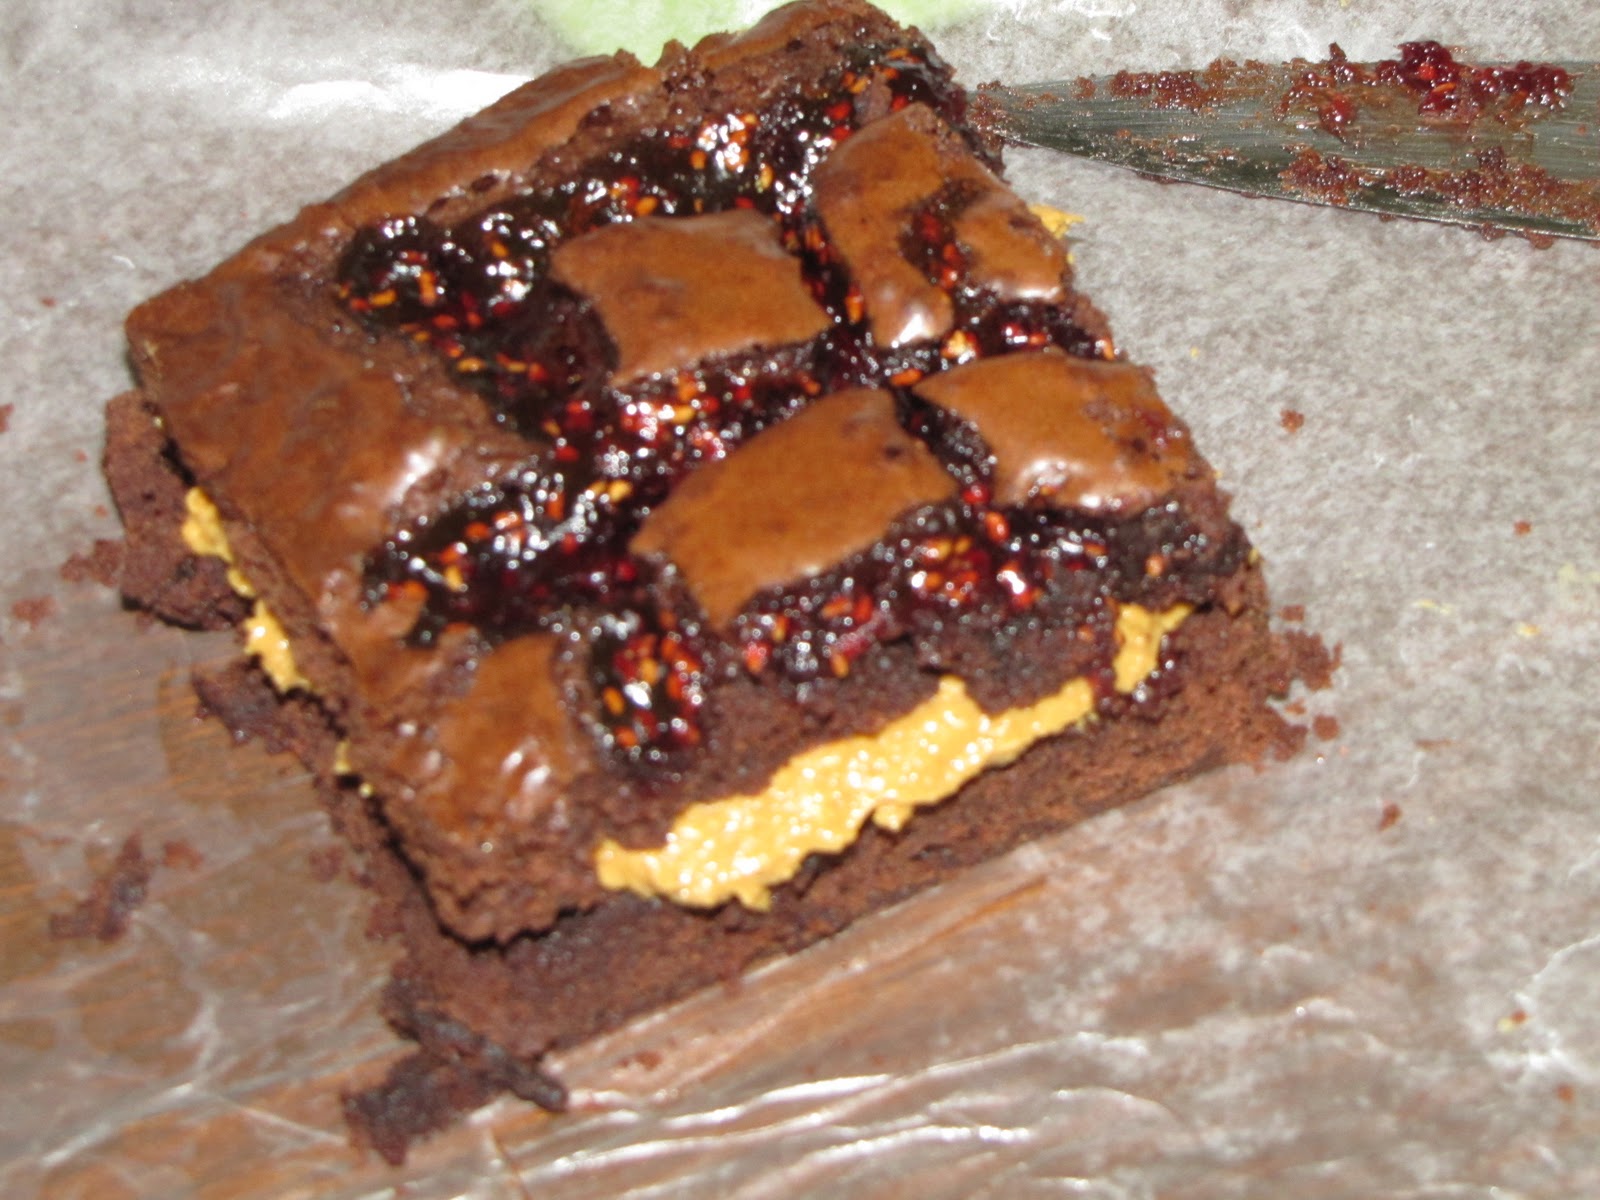
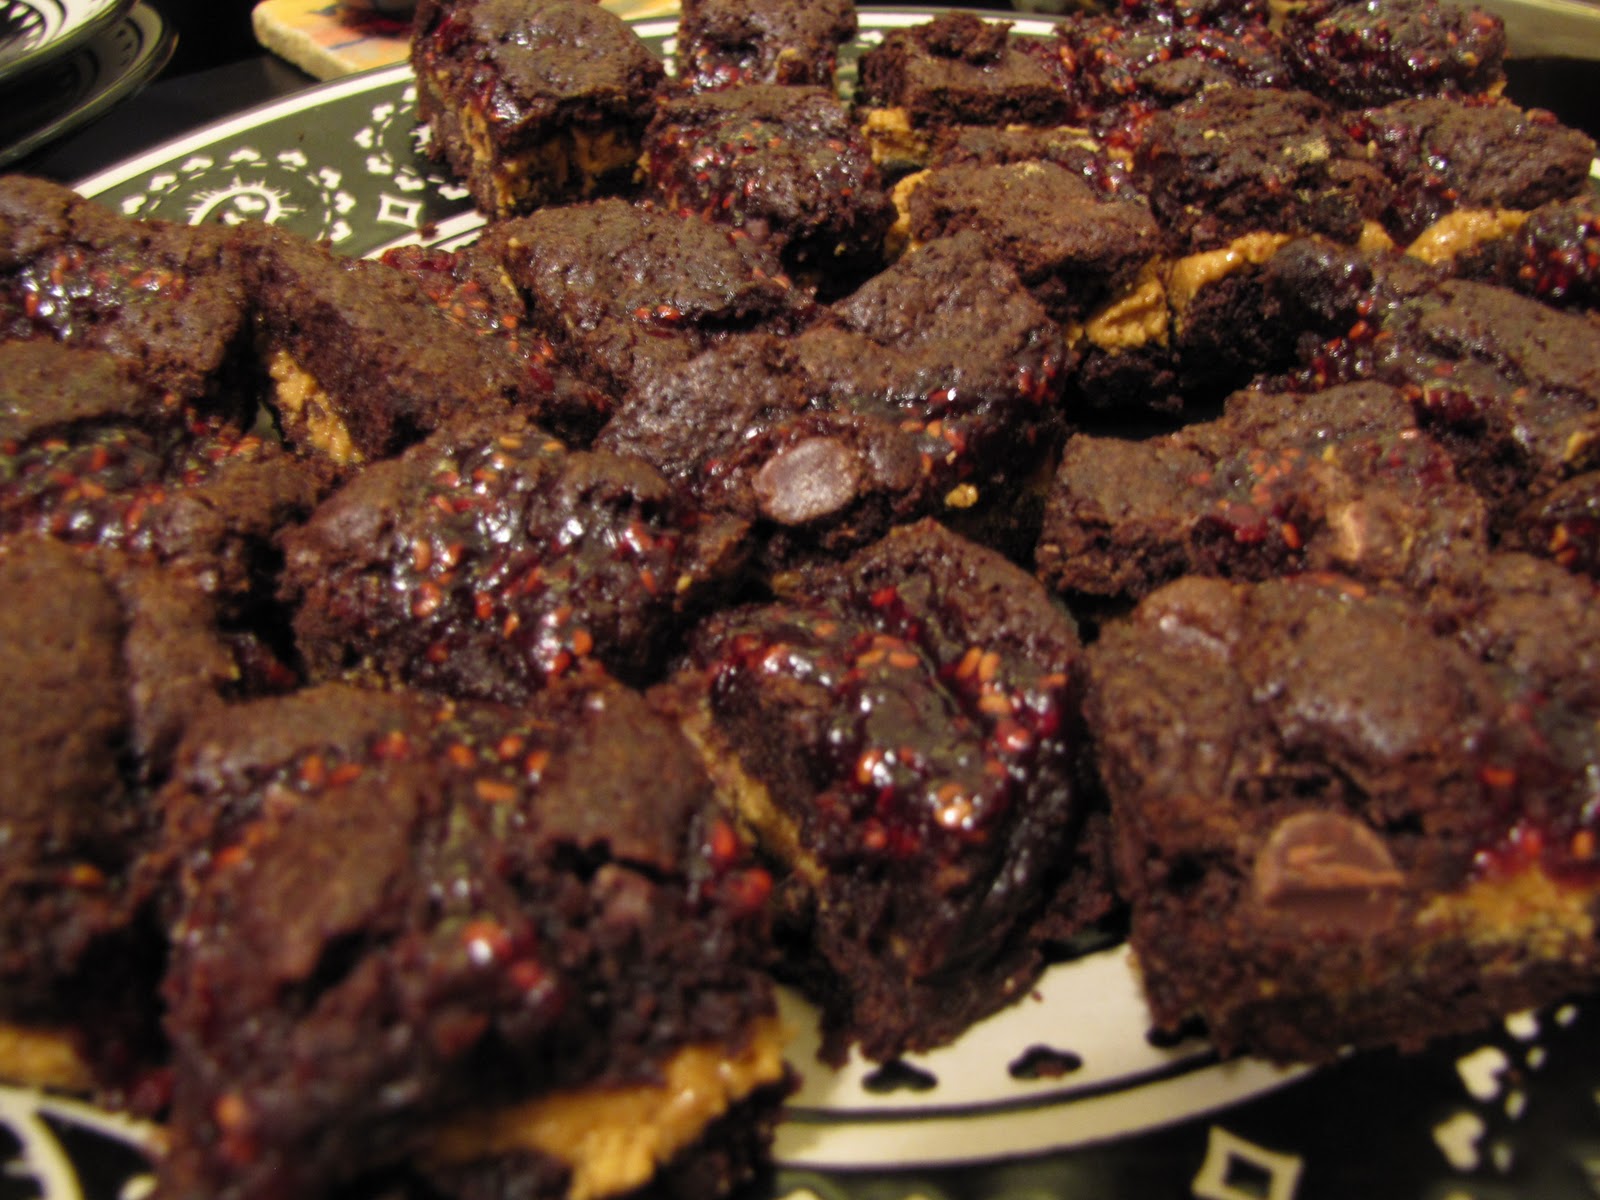
The cake was moist and dense, full of sweet banana flavor, interrupted only by the delight of bitter sweet chocolate.  This was a sturdy cake, able to stand up to a good topping, had I dedicated time to make one, or a delightful glaze.  I kept envisioning a orange glaze for some reason...perhaps I'll have to make again. 


This is a good cake recipe though folks-and I'll say the reviews from my co workers- who quickly figured out who the "stealth" giver was- were great. 

Tuesday, December 27, 2011

California Olive Ranch Olive Oil Chocolate Chip Cookies


Several months ago I had a wonderful time experiencing the deep, rich flavors of olive oil from the California Olive Ranch at a dinner here in Boston.  During the evening the reps from COR spent time talking about the versatility of Olive Oil, a topic I hadn't thought much of.  Normally I just saute with it, or whisk it into dressings, however they spoke of it's ability to take the place of butter in baking and that really piqued my interest.
 
Of course, butter is delicious.  It is a perfect pairing with golden brown toast, delicious melted over a piping hot mound of mashed potatoes, and a wonderful flavor in cookies and cakes.  However, butter also equals, well, less than nutritious elements and on the flip side, olive oil has so many wonderful properties I wondered how the substitution would be.  

I decided to check it out with America's classic cookie- the Chocolate Chip.  As American as apple pie, the chocolate chip cookie is flavored by those delicate elements of vanilla, brown sugar, salt, chocolate and, of course, butter.  So how would these cookies stand up without this crucial element?

Olive Oil Chocolate Chip Cookies

by Ashley Viegas | May 31, 2011
  • 2 ¼ cup all-purpose flour
  • 1 ½ tsp. salt
  • 1 tsp. baking soda
  • ¼ cup California Olive Ranch extra virgin olive oil
  • 1 tsp. vanilla extract
  • ¾ cup granulated sugar
  • ¾ cup brown sugar
  • 2 eggs
  • 1 or 2 Tbsp. of milk (or rice milk)
  • 1 cup chocolate chips
Preheat the oven to 375 degrees F.
Combine the flour, baking soda, and salt in a medium bowl and set aside.
Combine sugars, vanilla, and olive oil. Beat in the eggs one a time. Gradually beat in the flour mixture, then add in 1 Tbsp. of milk to make the dough a bit firmer, maybe another tablespoon if you feel the dough is too sticky/dry (I use about 1 tablespoon + 1 teaspoon).
Roll the dough into balls with your hands and place on a greased and/or lined baking sheet.
Bake for 10-12 minutes, until lightly golden and set. (Mine took about 10 and a half minutes.) These over bake quickly, so it’s better to take them out a bit early if you’re unsure. Allow to cool for a bit on the baking sheet, then move to another surface to finish cooling.
Recipe courtesy of Sydney Kania

Now I subbed in California Olive Ranch's Arbequina Extra Virgin Olive Oil in place of the regular Extra Virgin mainly because I didn't read labels.   The Arbequina has a stronger, fruitier flavor to it, so its presence was a bit more recognizable.  However, even with that error, these cookies were fantastic.  They maintained their tastes of vanilla and salt, the chocolate chips were warm and melty, and the cookies bore very very little difference to their higher caloric brother.  I think I have been converted- olive oil in baking- there's a way to start the new year on a healthier note!

Thursday, September 8, 2011

Pate a Choux with Creme Patissiere (Cream Puffs)

Every once in a while I realize how strange I really am.  I took some time off last week, and what did I decide to do with it?  Go to the beach?  Visit friends?  Take a trip to a land unexplored?  Nope- I knew I'd be happiest in my kitchen so I arranged a "stay cation" for myself to try out some ideas I had (see Caramel Apple Cupcakes) and to challenge myself to make some things I haven't made before.  One of those items- was classic Cream Puffs.

Now I have to be honest here- Cream Puffs were not my first thought.  My mom had thought that peach pie might be delicious with all the beautiful local peaches that are around- I agreed, but having had success already with pie crust recently, I decided instead to make turnovers with puff pastry.  Then I read that puff pastry required a fair amount of counter space....sadly counter space is not something I have to spare in my apartment so I kept looking through recipes.  And then I stumbled upon King Arthur Flour's recipe for cream puffs and I was sold. 

I love cream puffs- I love the subtle yet buttery flavor of the dough, I love how light and airy they are, I love that they are stuffed with cream filling.  Most of all, I love that they feel like little clouds when you bite into them.  A slight crisp on the outside gives way easily, like a bubble being popped, to the sweet whipped cream like filling.  They are just delicious pieces of heaven.  I have always assumed that they are difficult to make- that to achieve the proper puff, the eggy nature of the interior....I thought all of that spelled out hard to make.   However, what I found was quite the opposite- they were easy as pie to make- from the fluffy little shells to the Creme Patisserie I used from the expert on all things French- Julia Child.

Pate a Choux (recipe from King Arthur Flour)

1 cup water

1/2 cup (1 stick) butter, cut into pats
1/4 to 1/2 teaspoon salt; use 1/2 teaspoon if you're using unsalted butter
1 1/4 cups King Arthur Unbleached All-Purpose Flour
4 large eggs, at room temperature

1) Preheat the oven to 400°F. Lightly grease (or line with parchment) two baking sheets.


2) Combine the water, butter, and salt in a medium-sized saucepan, heat until the butter has melted, and bring to a rolling boil.


3) Add the flour all at once, stirring vigorously until the mixture smoothes out and follows the spoon around the pan; this should take less than 30 seconds.


4) Remove the pan from the heat, and let the mixture cool for 5 to 10 minutes. It'll still feel hot, but you should be able to hold a finger in it for a few seconds.


5) Transfer the dough to a mixer. Beat in the eggs one at a time; the mixture will look curdled at first, but when you add the last egg it should become smooth. Beat for 1 minute after adding the last egg. You'll have a stiff, smooth batter.


6) Drop the dough by teaspoonfuls onto the prepared sheets (a teaspoon cookie scoop works well here). Leave about 1 ½" to 2" between them; they're going to expand to about the size of a golf ball.


7) Bake for about 20 minutes, till they've puffed, they're a medium golden-brown, and they look dry.


8) Remove baked puffs from the oven, and use a sharp knife to cut a slit into the side of each puff, for steam to escape; this will help prevent them from becoming soggy. Return the puffs to the oven for 5 minutes, then remove from the oven, and transfer to a rack to cool. While the puffs are cooling, prepare the filling.****

****(I used the recipe from my King Arthur Flour Cook Book- the measurements were all the same- however they stated, at the end, instead to turn off the oven once they were done cooking, and crack the door open for a 1/2 hour.  I'm not sure what the difference would be-but that method worked for me!) 
Creme Patisserie (recipe from Julia Child's Mastering the Art of French Cooking)

1 cup granulated sugar


5 egg yolks


1/2 cup flour


2 cups boiling milk


1 tbsp. butter


1 1/2 tbsp. vanilla extract


Directions:


Gradually beat the sugar into the egg yolks and continue beating for 2 to 3 minutes until the mixture is pale yellow and forms "the ribbon".


Beat in the flour.


Beating the yolk mixture, gradually pour on the boiling milk in a thin stream of droplets.


Pour into saucepan and set over moderately high heat. Stir with a wire whip, reaching all over bottom of the pan. As sauce comes to a boil it will get lumpy, but will smooth out as you beat it. When boil is reached, beat over moderately low heat for 2 to 3 minutes to cook the flour. Be careful custard does not scorch in bottom of pan.


Remove from heat and beat in the butter, then vanilla extract. If the custard is not used immediately, clean it off the sides of the pan, and dot top of custard with softened butter to prevent a skin from forming over the surface. Creme Patisserie will keep for a week under refrigeration, or may be frozen.


I slightly amended the Creme Patisserie recipe by skinning and pureeing a single peach and then combining about a cup of the Creme Patisserie with 1/2 cup of the peach puree.  This gave the Creme Patisserie a more liquid texture but a beautiful peach flavor.

These were rather addictive to be honest.  Each one puffed up and made beautiful towers of pastry, but when sliced into were pleasantly cavernous allowing for maximum amounts of Creme Patisserie to be piped in.  I topped each with fresh raspberries and enjoyed every heavenly bite!  


Tuesday, September 6, 2011

Caramel Apple Pound Cake Cup Cakes

Whether we like it or not- Fall is quickly approaching.  The time for sweaters, woolen scarves and warming cups of tea is right around the corner.  I say, while it's sad to say goodbye to the wonderful sunny days of Summer, why fight it?  Recently a friend reminded me of the beauty of those wonderful Fall treats, Caramel Apples.  Crisp apples encased in luxurious caramel, warm and melty, chilled only by the brisk air-they are the perfect treat.  

Inspired by this idea this weekend, I turned to my kitchen and looked to see how I could re create this treat, but in typical fashion, put a little twist on it.  I played with the idea of a cupcake for several days, considering a variety of combinations and toppings.  However finally, I settled on the rich sturdiness of Pound Cake, over which I would spoon Caramel Apple sauce.  I loved the dense nature of the Pound Cake which I enhanced with the warming spices of Mace and Nutmeg.  The resulting flavor was a light hint of fall flavors, enhanced with the homemade caramel sauce.   I edited both of the recipes below- I've put my additions in italics under them.

Vanilla Pound Cake (recipe adapted from King Arthur Flour)
1 cup butter
1 cup sugar
3 tbsp packed light brown sugar
1/2 tsp salt
1 tbsp vanilla extract
1 tsp baking powder
1 3/4 cup unbleached all purpose flour or cake flour
4 large eggs
1 tsp mace
1/2 tsp nutmeg

In a large mixing bowl, beat together the butter, sugars, salt, vanilla, and baking powder until smooth and fluffy.  Add the flour and mix well; the batter will be almost like paste.  Beat in the eggs, one at a time, beating well and scraping the bottom and sides of the bowl after each addition; the batter will be quite fluffy.  

Spoon the batter into a lightly greased 9-10 inch tube pan, 9-10 cup bundt pan, or 9 x 5 inch loaf pan.  Bake the cake for about 45 minutes, or until a cake tester or tooth pick inserted into the center comes out clean.  Remove the cake from the oven and let it cool in the pan for 10 minutes.

I spooned the batter into a cupcake pan, and then watched the cupcakes starting at a 1/2 hour.  They came out of the oven around 33-34 minutes.

Deep, Dark Salted Butter Caramel Sauce [Sauce au Caramel au Beurre Salé] Recipe from the Smitten Kitchen


Makes about 1 1/3 cups


3 ounces (6 tablespoons) salted butter, the better you can get, the better it will taste---I used unsalted butter and then added 1/2 tsp - 1 tsp of salt
1/2 cup plus two tablespoons heavy cream, at room temperature

Melt the sugar over medium to moderately high heat in a larger pot than you think you’ll need-at least two or three quarts, whisking or stirring the sugar as it melts to ensure it heats evenly. Cook the liquefied sugar to a nice, dark copper color. Add the butter all at once and stir it in, before turning off the stove and pour in the heavy cream (The sauce will foam up quite a bit when you add it; this is why you want the larger pot.), whisking it until you get a smooth sauce.

You use it right away or pour it into a jar and store it in the fridge for up to two weeks. When you take it out, it will likely have thickened a bit but 60 seconds in the microwave brings it right back to pouring consistency.

Caramel Apple Sauce
2 small semi tart apples, cored and chopped.
1 tbsp butter
1 tsp cinnamon
1 tsp nutmeg
1/2 tsp salt
1/3 cup chopped walnuts (optional)
1/2 - 3/4 cup caramel sauce (recipe above)

In a saute pan over low heat melt the butter and add the cinnamon, nutmeg and salt.  Add the apples, and stir until they are coated with the spice mixture and just slightly tender.  Add the walnut and the caramel sauce and stir until combined. 

Spoon the caramel apple sauce over the cupcakes and serve. 

Monday, August 15, 2011

Peanut Butter and Jelly Sandwich Cookies

I'm not one for wishing seasons away, but the past couple of weeks I've been thinking about fall.  The back to school commercials are out, my favorite Pumpkin beers are on the shelves, and (for the time being) the temperature is more bearable.  Usually when it gets to this part of the summer, my instinct turns to baking. 

Today, I was struck hard with the desire to bake, and for some reason-my thought was for honey cookies.  Don't ask me why, I've never had honey cookies before, but they just sounded delicious to me.  So, as I went about my Sunday routine (grocery shopping) I kept thinking about honey cookies.  Now, when I think honey, I think peanut butter.  For some reason-they go hand in hand.  So then I started thinking about Peanut Butter and Jelly sandwiched between honey cookies.  This whole idea sounded pretty tasty to me, and I figured- perfect for fall and back to school snacks!

A quick search of the internet found me on A Cozy Kitchen's website- reading through her recipe for Honey Bee Cookies.  These looked simple to make, and looked absolutely delicious.  Even better, all of the ingredients were located in my cupboard.  Phenomenal.

These cookies were incredibly easy to make, and with spirals of peanut butter and jam drizzled in between two -they are fantastic little sandwich cookies.  

Honey Bee Cookies
Adapted from A Cozy Kitchen's adaptation of the Alpha-Bakery Children’s Cookbook
½ cup butter, softened
½ cup packed brown sugar
½ cup honey
1 egg
1 ½ cups all purpose flour
½ teaspoon baking soda
½ teaspoon salt
½ teaspoon ground cinnamon


Preheat the oven to 375 degrees.


Beat together the butter, brown sugar, honey and egg in a medium bowl until smooth, scraping the sides occasionally. Stir in all remaining ingredients.


Drop spoon fulls of dough onto a greased or lined baking sheet. Bake about 7 to 10 minutes, or until the cookies are set and the edges are beginning to brown. The cookies will still look shiny when they’re done.


Wednesday, August 10, 2011

S'Mores Marshmallows

I adore when I can pay back debts in food.  Obviously, this doesn't work all the time, but a friend who has been doing me a pretty humongous favor the past few months has agreed to payment via baked goods- a God send that guy is!  So last night, finding myself with unexpected downtime, I decided to try my hand S'mores Marshmallows. 

We all remember S'mores from when we were kids- a sweet and puffy marshmallow toasted up over a roaring campfire sandwiched between two graham crackers with chocolate in between, melting from the heat of the marshmallow.  The result was always a sticky mess, but completely and utterly delicious.  I won't lie- I could NEVER stop at just one. 

S'Mores Marshmallows combine all of the same aspects of that great childhood treat- marshmallow, melted chocolate and graham crackers.  They are simple to make, and definitely satisfy that "S'More craving".

25 Marshmallows (large size)
6-7 squares of Semi Sweet baking chocolate
1/2 package of Graham Crackers, crumbled into small pieces

Melt the chocolate either in a double boiler, or in a glass bowl over a pot of boiling water.  While the chocolate melts, crumble the Graham Crackers.  I laid these out in a thick layer on a sheet of wax paper.  Once the chocolate has melted, give it a quick stir to ensure all the lumps are out, and then dip a marshmallow into the chocolate- covering as much of the surface as possible with the chocolate.  Once the marshmallow is sufficiently covered, roll it in the Graham Cracker crumbs.  Set aside to cool.  Continue these steps until all of your marshmallows are completed. Enjoy.

Now there was one major component of these tasty treats missing- the campfire.  The burned sugar was gone, no blistered smoky spots present.  To me, a lover of burned marshmallows, this point was a little sad.  I think that the next time I make these however Ill leave one end of the marshmallow uncovered, and use my blow torch to caramelize it.  

Either way- these are a great treat for these summer months, when a campfire is just not possible! 

Monday, July 18, 2011

Apple Pie- the Ultimate Comfort Food?

Sometimes life is hard.  Sometimes, things are stressful, days are long, and there doesn't appear to be an end in sight.  Sometimes you just want something comforting to envelope you like a big hug and squeeze until that monster under your bed has found a new home to live in.  Sometimes you just want to indulge in something that brings you back to childhood, when your biggest concern was staying up past your bed time, and not that terrible deadline that is looming.  On days like those, a nice big slice of apple pie is often all that's needed to bring you the comfort that you so desperately seek. 

Now, I know what you're going to say- it isn't the season for apple pie!  Apple pie is supposed to be made with it's cold outside and the wind howls and that "white stuff" falls from the sky.  Traditionally, sure, I agree with you. However, when life is handing you a rough hand, I see nothing wrong with perking up with a nice slice of homemade apple pie- and maybe even top it with some ice cream!

With all of this in mind, I set off this weekend to my first ever apple pie- a task I have always left to my mother.  I began with the pie crust.  Ever since my trip to King Arthur Flour earlier this summer, I have wondered if my pie crust knowledge would translate in my own kitchen, or if I would fail without the watchful aid of the King Arthur Flour ladies on my side.  I figured there was no way to find out without trying and so I cracked open my big King Arthur cookbook and got to work on their basic pie dough.

2 2/1 cups all purpose flour
1 cup butter (cold)
1 teaspoon salt
1/4 cup - 1/2 cup ice cold water

As I was taught at KAF, I whisked together the salt and the flour, then I cut half the butter into the dry ingredients and combined the two with a fork.  Then I added the remainder of the butter in the same way.  The idea here is that when you add the butter in two batches, pieces of the butter remain in tact to some degree and are pretty big in the dough.  The benefit to some of the butter keeping its size, is that when you go to bake the dough later, the butter melts in the oven and creates steam.  That steam creates that lovely flaky affect in the pastry.  After adding the butter- is the "tricky" part.  Add the water, just a little at a time, until the dough holds together when you make a ball.  The challenge here it to a. not use too much water (pasty-yuck), and b. to not over work the dough.  If you handle the dough too much, the butter will melt and you can say good bye to those flakes we were hoping for.  Once the ingredients are combined, turn out the dough, which will still be a little crumbly, and lump it together on your counter top.  Using the heels of your hands, push the dough together and then kneed it out away from you in one motion, fold it and kneed it one more time.  The dough should be well formed at this point, wrap it in Saran wrap or wax paper and refrigerate for at least two hours- I left if there over night.

The next morning, armed with my pie crust and 7 Granny Smith apples, I made my way to my mothers to take full advantage of both her expertise and her air conditioning.  We peeled the outer skins off the apples, cored them, and sliced them.  Then we combined a bout a cup of sugar, a couple of tablespoons of flour, cinnamon and nutmeg to taste and just a spot of salt in a small bowl.  We had no exact measurements.  My mom's apple pie is a feeling- if the apples are very juicy- a little extra flour is added, if they are a bit dry, less is used.  If the apples are extra sweet, less sugar is used- and so on until perfect marriages are found.  We added the dry ingredients to the apples, tossed, and then let them hang out together, marinating in the spices and allowing the juices and flavors to mingle.  

I rolled out half my pie crust and lined the bottom of a square pie plate, and then rolled out the other half for the pies top.  In this piece of dough I etched a tree-some might have called it an apple tree-personally I don't think my artistic skills warranted that.  However, once the oven was heated to 425 degrees, we loaded the apples into the pie plate, dotted the top of the apples with just small little pats of butter for a little extra "love", covered them with the top pastry level, squeezed the two pastry layers together and painted the top with heavy cream to give color to the top dough.  Then, as an added touch, we sprinkled an even mix of cinnamon and sugar over the top for some fun crunch and flavor. 

I ask you-is there anything, anything, so wonderful as apple pie?  The spicy flavors from the cinnamon and nutmeg combined with the sweet tart apples all encased by flaky pastry...it is heaven on a plate. 

What is your favorite comfort food?  When you've had a tough day- what do you most want to help you get through it?   

Monday, March 21, 2011

Peanut Butter and Jelly Brownies

You may have noticed-I don't bake very much.  It's not because I don't enjoy baked goods, quite the contrary in fact, it's that I cannot have them in my home for long.  As soon as some tasty treat comes out of my oven I am immediately picking at it.  However, every so often I whip up something, and then banish it from my house immediately.  A couple of weeks ago I was looking for a good recipe to bake up as a treat for a friends birthday, one that I would gladly enjoy with her, and then leave with her. 

My original plan was for chocolate cupcakes with peanut butter frosting, inspired by the genius of Beantown Baker, and then I got home that night, after a long day of work, the gym and various errands and I realized that I didn't have confectioners sugar, the grocery store seemed very far away, and then I saw that box of brownie mix that was included in a swag bag months ago.  I stared at it for a while, wondering if as someone who constantly goes out of my way to make things from scratch, if I could possibly use a box of brownie mix.  I looked at my aching feet from a too hard work out and declared that I could use it.  With that, my idea for Peanut Butter and Jelly Brownies was born.  I made a quick run to the convenience store for peanut butter, raspberry jam and graham crackers.

The beauty of this recipe, beyond it's incredible ease to make, is it's variations of flavors and textures all while calling to mind those awesome PB&J sandwiches that mom used to make.  Am I the only kid who would occasionally sneak a few chocolate chips into my sandwich when her back was turned?

Your favorite Brownie mix, homemade or box, I'm fine with either. Follow the recipe for an 8x8 pan.
1/3 cup red raspberry jam
3/4-1cup creamy peanut butter
1 1/2 to 2 full Graham Crackers


In a small sauce pan heat the raspberry jam over low heat until it is just melted. Make the brownie batter according to your preferred recipe, pour the batter into a well greased pan. Using a spoon gently drizzle the jam over the batter ensuring even distribution. Bake the brownies according to their directions.


When the brownies are done, remove from the oven and cool completely.


Place the Graham Crackers in a small plastic bag, and, using a rolling pin, crumble the crackers so they resemble grains of sand. In a small bowl combine the peanut butter and the cracker crumbs so that the crumbs the ratio appears 50/50 and the consistency is crunchy.  The key here is to combine the peanut butter and the crumbs together slowly so you can monitor the texture.


Remove the brownies from their pan, and then I find it easiest to cut the square into quarters. Slice each quarter in half-careful to cut under the jam layer enough to not disrupt it, place the top half (jam side) to the side and spread the peanut butter mix on the bottom half in an even layer. Top with the jam side. Repeat with the remaining quarters. I found that for best results, refrigerate the quarters for an hour or so before cutting into bars to allow the layers to set.
I have made these brownies a couple of times now and am finding myself completely obsessed.  They are sweet, rich and decadent.  The rich chocolate of the brownie is nicely cut by the sweet tart beauty of the raspberry jam, and the peanut butter which I often find to be too sticky, takes on a crunchy, unexpected twist.  All together these brownies are completely addictive, and I am once again looking for another reason to whip them up!  

Wednesday, February 9, 2011

Chocolate Covered Bacon

Years ago, I headed out for a cocktail with a good friend of mine, and as we ordered our standard drink at the time, a Cosmo, I remember her very seriously looking at me and imparting words of wisdom.  "Fiona" she said, "Now that Sex and the City has ended, we can really only order Cosmos for another 6 months or so, before they are completely out of style." She was right, within 6 months if you ordered a Cosmo, the bartenders looked at you a little funny.  Of course I'm not here to talk to you about cocktails, I am however here to talk to you about food- and, more specifically, bacon.  2010 was the year of bacon.  It showed up everywhere, breaking free of its breakfast and the occasional BLT binds, it morphed into desserts, appeared more prevalently in salads, and basically be THE addition to any myriad of dishes.  However, as 2010 faded into its place in history, I think it can be said, with a fair sigh of relief, that the fad Bacon appearing in every dish also faded.  Of course that doesn't mean bacon has disappeared from menus everywhere, quite the contrary actually, but it does mean that it will be used in moderation much more effectively.  However, based on the aforementioned Cosmo rule, I decided that I could ride the bacon chic coattails for a little longer- and made the perfect dessert for Super Bowl Sunday- Chocolate Covered Bacon.

That's right- I said it.  Chocolate Covered Bacon in honor of the biggest pigskin match up of the year.  It seemed fitting, right?  Or I just wanted bacon...and chocolate. Honestly though, how could I go wrong?  Crisp, salty bacon slathered in sweet, silky chocolate...a duo made in heaven. 

Chocolate covered bacon was shockingly easy to make, which makes it incredibly dangerous as I now know I can have this delightful treat anytime I want.   I see the bright red "DANGER" sign flashing....

Ingredients:
5 strips of bacon, cut in half to create 10 smaller pieces
2 1 oz square of semisweet chocolate
Water

Lay the bacon flat on a rimmed baking sheet lined with tinfoil, bake at 400 degrees until crisp.  Remove from baking sheet, and set aside to cool.

You'll want to melt the chocolate over indirect heat.  To do so, find a glass bowl that will set fit about 1/4 to 1/2 way into a sauce pot.  Fill the sauce pot with water until it is just touching the bottom of the glass bowl.  Bring the water to a boil, and add the chocolate squares.  Monitor the water to make sure it doesn't boil over, or go too crazy.  The heat from the gently boiling will melt the chocolate into creamy perfection.  

Once the chocolate is completely melted, dip the pieces of bacon into it, using a silicone brush to fill any cavities and to brush off excess chocolate.  Place the coated pieces onto a piece of wax paper and allow to cool and harden.
Enjoy!  

Share it

LinkWithin

Related Posts Plugin for WordPress, Blogger...

Groupon

Chobani Love